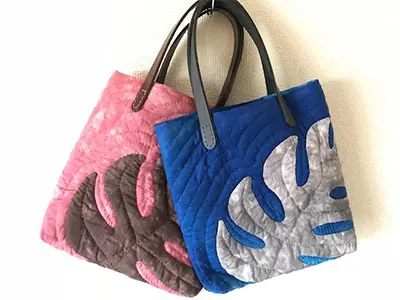
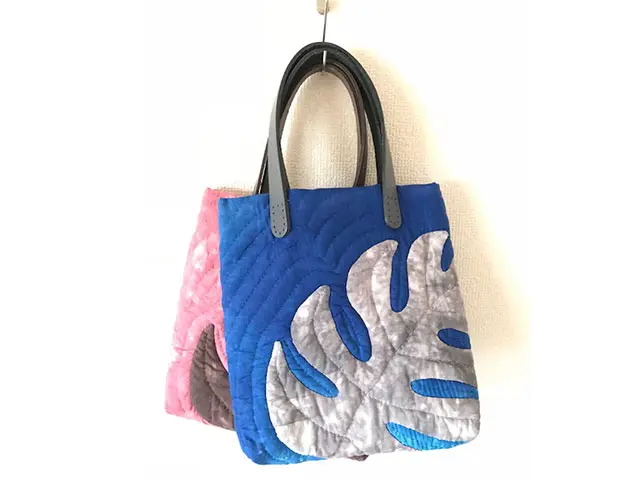
Monstera Applique Bag
ออกแบบโดย
Satsuki 'MAY' Okamoto
ขนาดเมื่อทำเสร็จแล้ว
Width approx.25cm x Length approx.25cm
ผลิตภัณฑ์
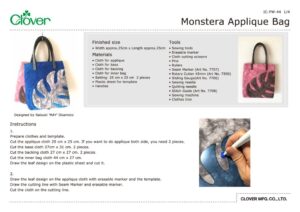
Sewing tools
Erasable marker
Cloth cutting scissors
Pins
Rulers
Sewing needle
Quilting needle
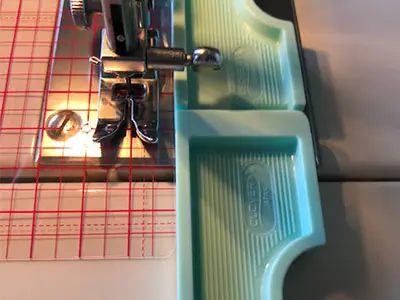
Sewing machine
Clothes Iron
Materials
• Cloth for applique
• Cloth for base
• Cloth for backing
• Cloth for inner bag
• Batting: 25 cm x 25 cm 2 pieces
• Plastic sheet for template
• Handles
วิธีทำ
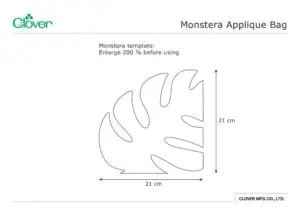
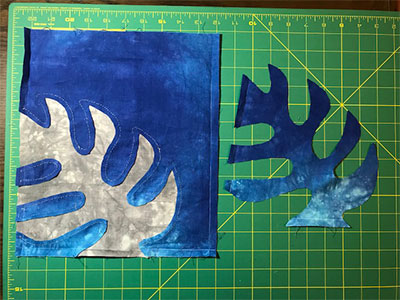
Prepare cloths and template. Cut the applique cloth 25 cm x 25 cm. If you want to do applique both side, you need 2 pieces. Cut the base cloth 27cm x 31 cm. 2 pieces. Cut the backing cloth 27 cm x 27 cm. 2 pieces. Cut the inner bag cloth 44 cm x 27 cm. Draw the leaf design on the plastic sheet and cut it.
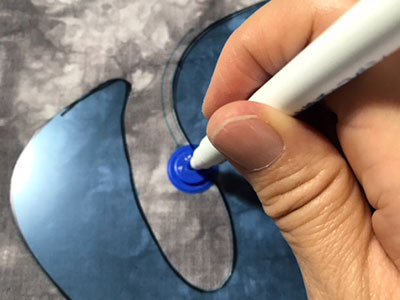
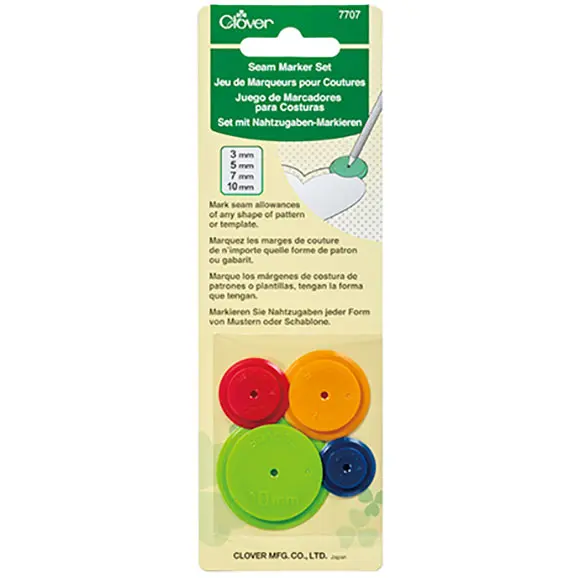
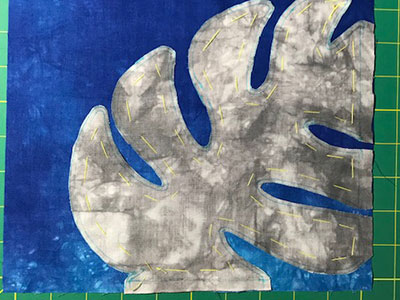
Draw the leaf design on the applique cloth with erasable marker and the template. Draw the cutting line with Seam Marker and erasable marker. Cut the cloth on the cutting line.
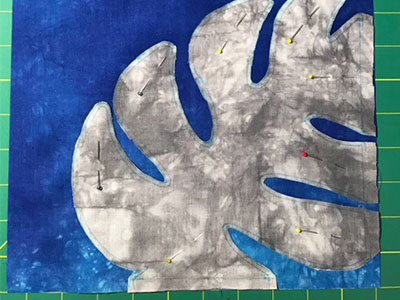
Place the applique cloth on the base cloth and pin it. Applique cloth and base cloth are right side up. Baste it.
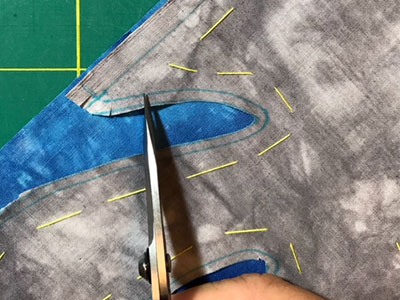
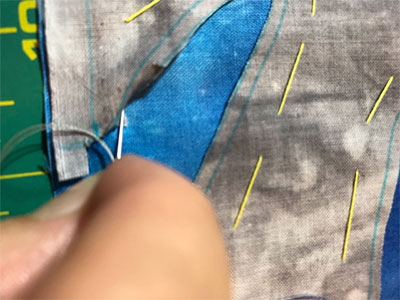
Applique the leaf on the base fabric with tiny stitch. On the curve area, clip the seam allowances. Fold the seam allowances with tip of needle.
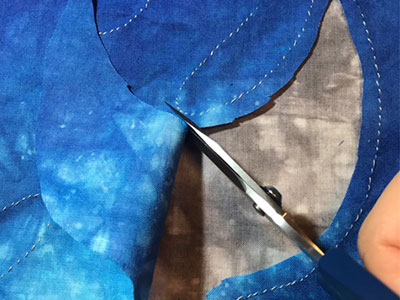
Cut the base cloth of underneath of leaf. Leave 3 mm of seam allowances from the stich line.
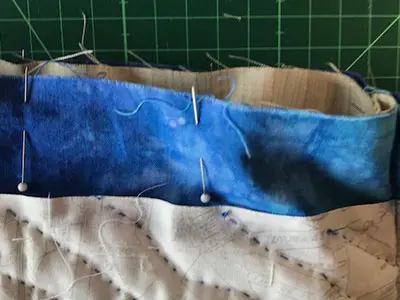
On the wrong side of backing cloth, place the batting and right side of appliqued cloth. Do basting.
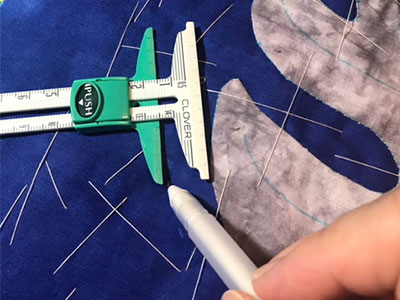
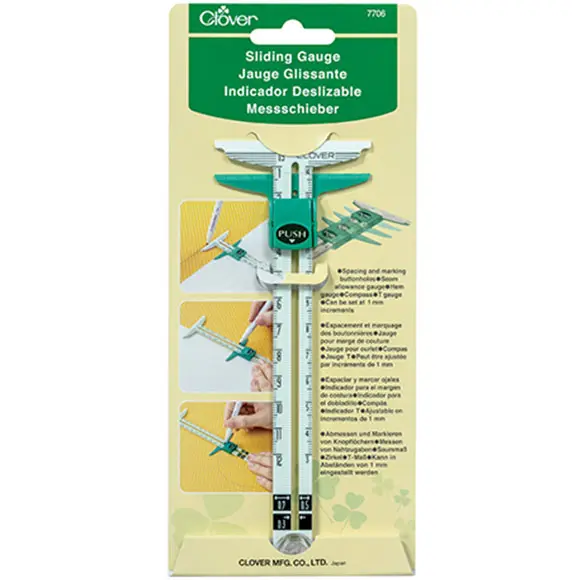
Draw the quilting line with Sliding Gauge and Erasable Marker. Draw the line 1.5 cm pitch until the end. Do quilting.
Sew the bag.
Outer: both side and bottom with 1cm seam allowances.
Inner: Fold the cloth in half.
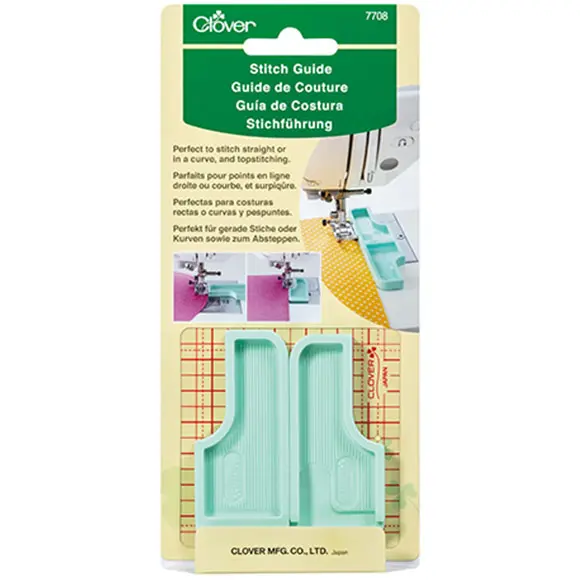
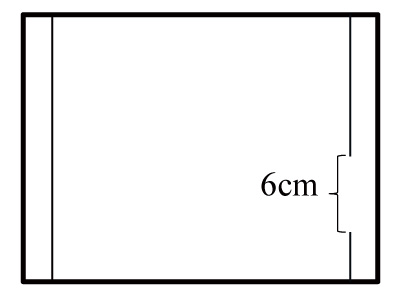
Sew one side from bottom to top. On the other side sew 3 cm from the bottom line and leave 6 cm. Start to sew again at 9 cm from the bottom. You need the gap for turning the bag inside out at the end. Use stitch guide at 1 cm and sew them with 1 cm seam allowances. Put the outer and inner together. Outer is wrong side out. Inner is right side out. Put the inner in the outer. Sew them at the top of bags with 1 cm seam allowances. Turn the bag inside out at the open area of the inner bottom. Wash it. Iron it.