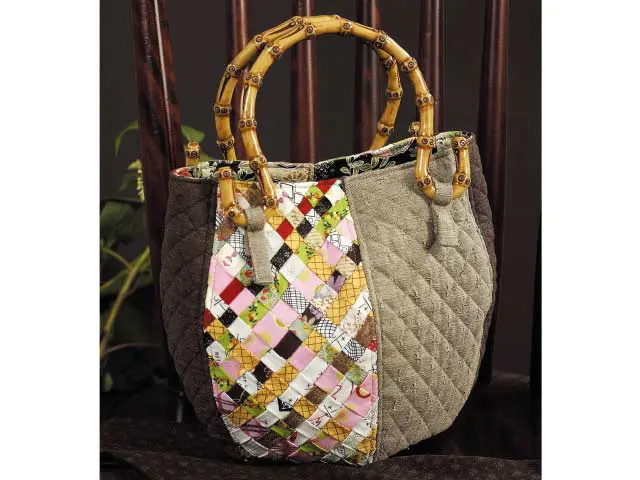
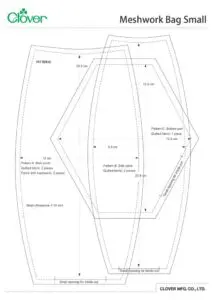
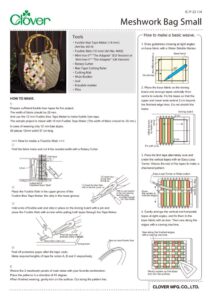
Meshwork Bag Small
ผลิตภัณฑ์
Erasable Marker
Cutting Mat
Wide Bodkin
Pins
วิธีทำ
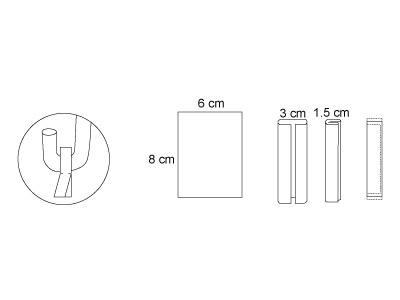
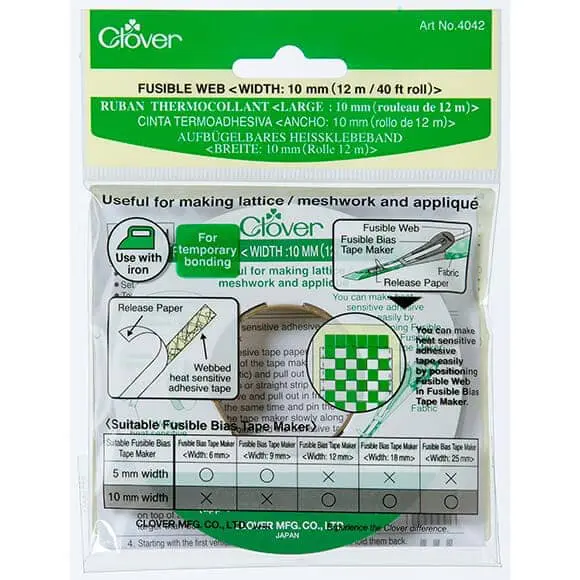
Prepare sufficient fusible bias tape for the project. Use the 12 mm fusible Bias Tape Maker to make fusible bias tape (the width of the fabric should be 25 mm). The sample project is mixed with 18 mm Fusible Tape Maker (the width of the fabric should be 35 mm). In case of weaving only 12 mm bias tapes. 56 pieces 12 mm width 37 cm long
How to make a Fusible Web
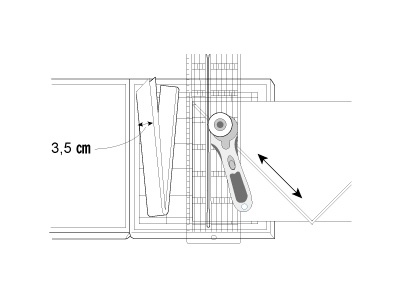
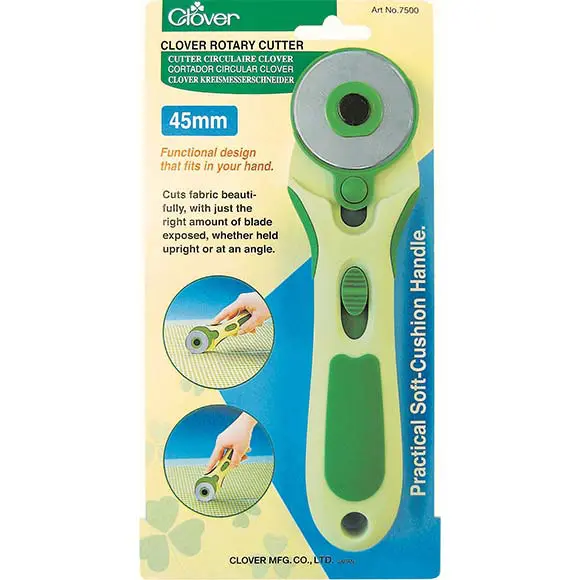
Fold the fabric twice and cut the needed width with a Rotary Cutter.
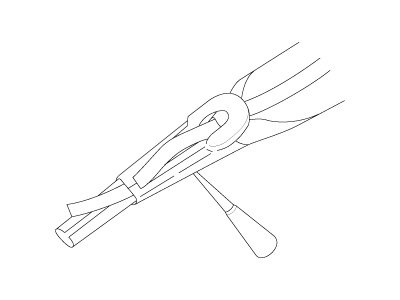
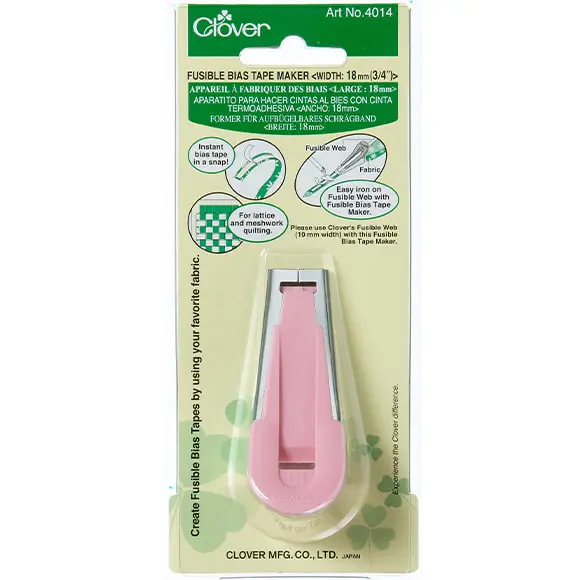
Place the Fusible Web in the upper groove of the Fusible Bias Tape Maker, the strip in the lower groove.
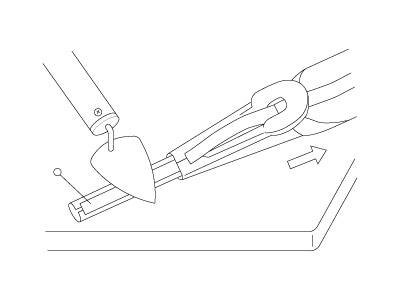
Hold ends of fusible web and strip in place on the ironing board with a pin and press the Fusible Web with an iron while pulling both tapes through the Tape Maker.

Peel off protective paper after the tape cools. Make required lengths of tape for colors A, B and C respectively.
How to make a basic weave.
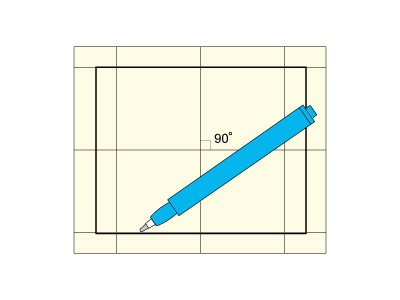
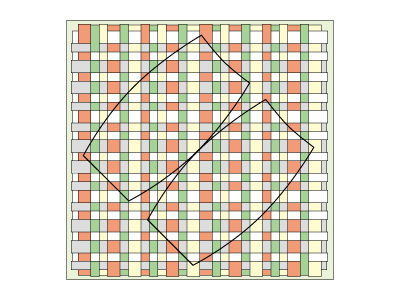
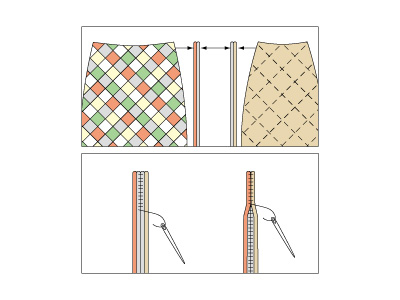
Draw guidelines crossing at right angles on the base fabric with a Water Soluble Marker.
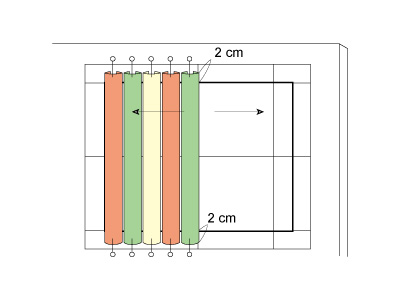
Place the base fabric on the ironing board and arrange tapes vertically from the center to the outside. Fix the tapes so that the upper and lower ends extend 2 cm beyond the finished edge lines. Do not stretch the tapes.
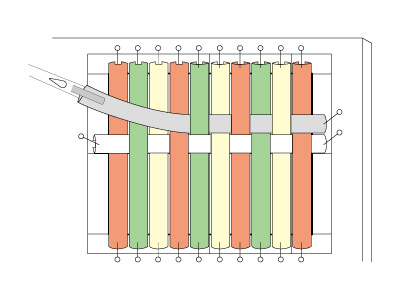
Pass the first tape alternately over and under the vertical tapes with an Easy Loop Turner. Weave the rest of the tapes to make a cheched pattern.
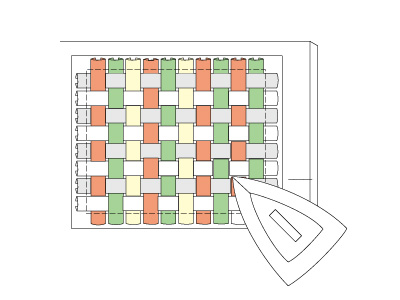
Gently arrange the vertical and horizontal tapes at right angles and fix them to the base fabric with an iron. Then, sew along the edges with a sewing machine.
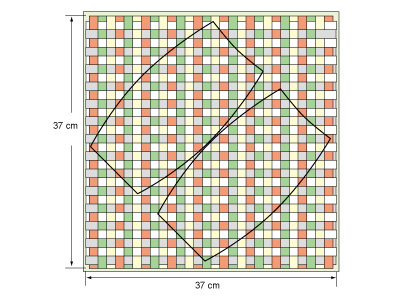
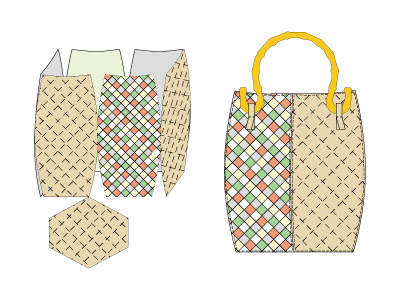
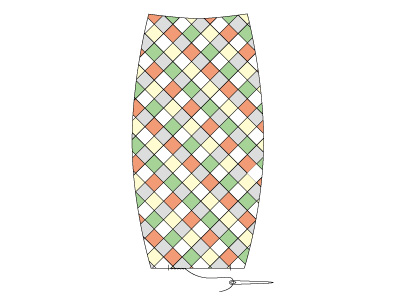
Weave the 2 meshwork panels of main sides with your favorite combination. Place the patterns in a direction of 45 degree. When finished weaving, gently iron on the surface. Cut along the pattern line.
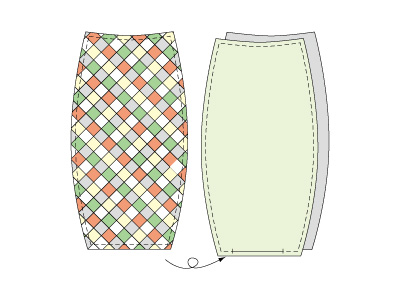
Sew the meshwork part and liner fabric’s right side together.
Stitch from the reverse side leaving the small space for the opening.
When finished, turn inside out. Stitch the opening part.
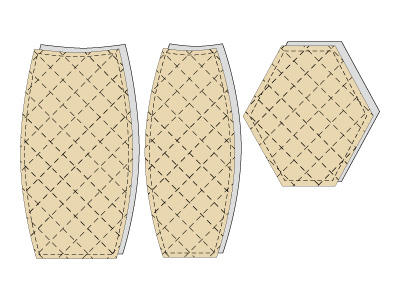
Make the quilted fabrics and cut the parts following the patterns and sew them together with the liner fabrics the same size as the meshwork parts.
Stitch together each part one by one.
At first stitch together from liner fabrics and next stitch right side fabrics as shown.