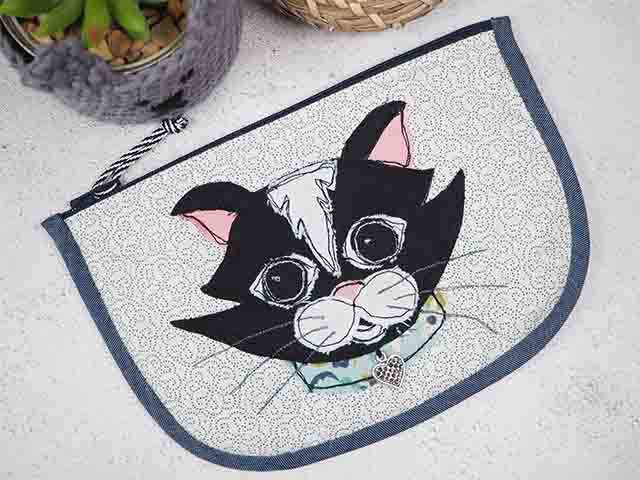
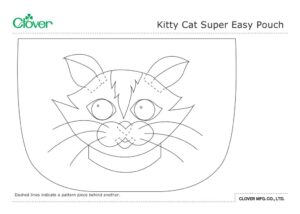
Kitty Cat Super Easy Pouch
ออกแบบโดย
Debbie von Grabler-Crozier
ผลิตภัณฑ์

Materials
Fabric
• Fat eight fabric for the outer
TIP: because of the applique, choose a design that is not too busy
• Fat eighth fabric extra for the lining
• Fat Quarter of light denim fabric to make the bias binding
• Scraps of fabric for the cat.
These do not have to be very big, only large
enough to cover the applique section in question.
Interfacing
• Fat 8th fusible interfacing.
I am using H630 by Vlieseline
Everything Else:
• 18cm zip to coordinate with your fabric
• Fabric glue
• Small metal charm to decorate his collar
• Your usual sewing needs
วิธีทำ
Preparation
NB: seam allowances are all ½ cm unless otherwise stated. Please read all instructions through and assemble the equipment before beginning. You will need a darning foot and a zipper foot for your machine.
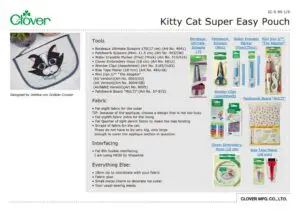
Fuse the interfacing to the wrong side of the outer fabric but do not trim anything yet. Draw the pouch onto the outer fabric with the water erasable marker twice using the template.
TIP: you will be using the embroidery hoop upside down for the machine applique so make sure that there is enough fabric around the edge of the drawn pouch outline to fit the hoop IMAGE 1.
Cut two pieces of lining using the pouch template. These can be trimmed and set aside.
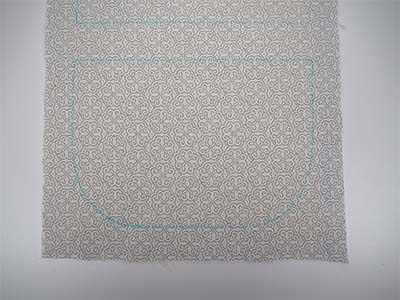
Cut the applique pieces from your scraps and use the fabric glue to glue them into place on the pouch front IMAGE 2.
TIP: on the template where you see dashed lines, it means that an applique piece is behind another.
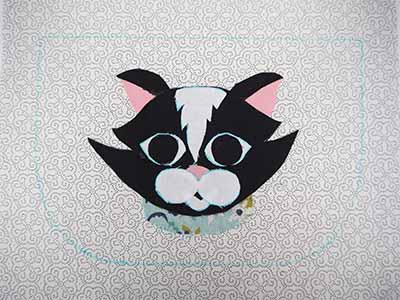
Thread your machine with black thread and set it up for free motion embroidery.
TIP: each machine is different so consult your manual for details.
Place your applique in the hoop upside down and under your machine needle IMAGE 3. This makes it sit perfectly on the feed plate of your sewing machine and gives you something to steer with.
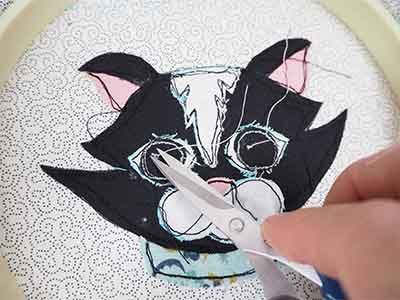
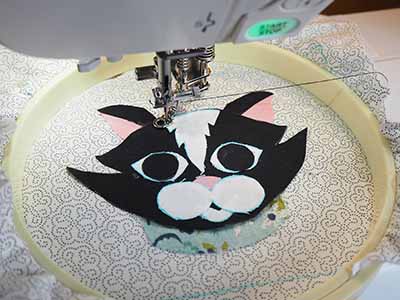
Applique the cat face slightly in from the edge of the fabric pieces. Go around some of the larger pieces twice and don’t be too neat. The tiny stitches will mean that the pieces do not fray. When you have finished the applique, snip any loose threads IMAGE 4. Cut the front and the back pouch panels out.
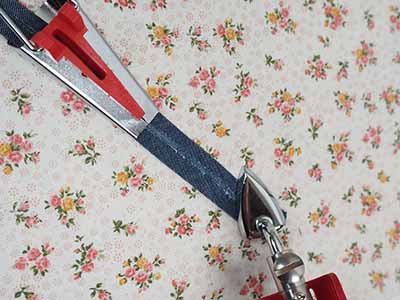
Make the bias binding by cutting strips of denim on the bias (diagonal) and sewing them together if necessary to make a piece of bias tape 45 cm long. Run them through the bias tape maker and press with the iron IMAGE 5.
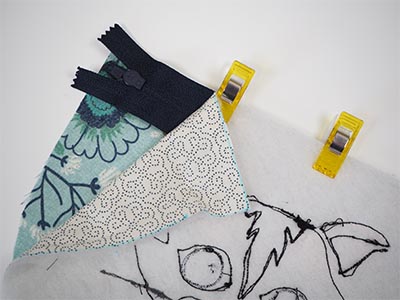
Take the appliqued front panel, one of the lining pieces and the zipper. Make a ‘zipper sandwich’ by having the outer and the lining right sides facing and the zipper in between. Clip ready for sewing IMAGE 6.
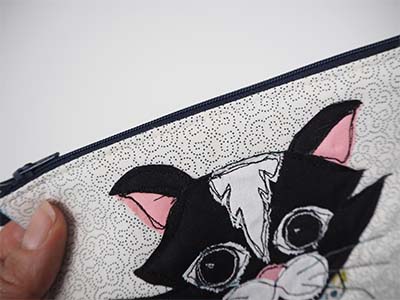
Sew along the length of the zipper. Flip the outer and lining the right way out (bringing the zipper to the top) and then topstitch along the zipper length IMAGE 7. Repeat this for the other side.
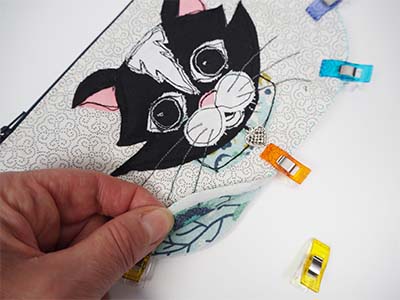
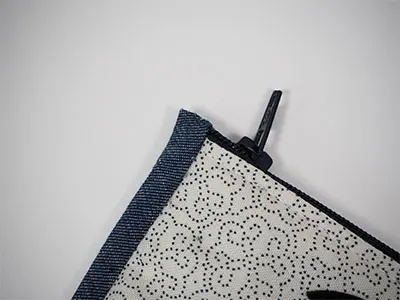
Bring the four layers (two outer and two lining) together and clip IMAGE 8. Baste around the bottom curve to keep the layers together.
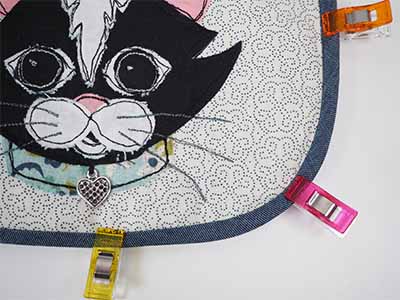
Add the bias binding to the curve IMAGE 9.