
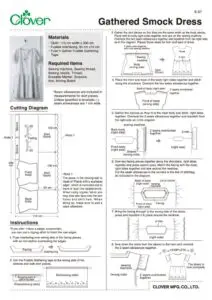
Gathered Smock Dress

ผลิตภัณฑ์


Materials
• Cloth: 110 cm width x 300 cm
• Fusible interfacing: 80 cm x15 cm
• Fuse’n Gather Fusible Gathering Tape
วิธีทำ
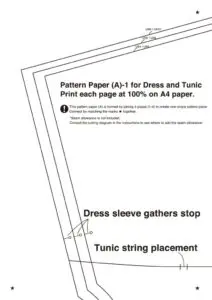
Cutting Diagram
*Seam allowances are included in measurements for skirt pieces. Unless specified in brackets ( ), seam allowances are 1 cm wide.
The piece in the photograph is made of ""Fabric with a scalloped edge"", which is manufactured to have a lace like appearance. When using regular fabric you may also sew lace onto the arm holes and skirt hem. When doing so, make sure to add a seam allowance.
*If you don' t have a serger (overlocker), you can use a zigzag stitch to finish the raw edges.
Fuse interfacing onto wrong side of the facing pieces with an iron before overlocking the edges.
Iron the Fusible Gathering tape to the wrong side of the sleeves and both skirt pieces.
Gather the skirt pieces so that they are the same width as the body pieces.
Place skirt to body,right sides together and sew on the sewing machine.
Overlock the two seam allowances together and topstitch from the right side, as in the diagram. Repeat these steps for front and back of dress.
Place the front and back of the body right sides together and stitch along the shoulders. Overlock the two seam allowances together.
Gather the sleeves so they fit to the main body and stitch, right sides together. Overlock the 2 seam allowances together and topstitch from the right side as in the diagram.
Sew two facing pieces together along the shoulders, right sides together and press seams open. Match the facing with the body, right sides together and sew around the neckline.
Cut the seam allowances in the corners to the line of stitching, as indicated in the diagram.
Bring the facing through to the wrong side of the dress, press and topstitch it in place around the neckline.
Sew down the sides from the sleeve to the hem and overlock the 2 seam allowances together.