
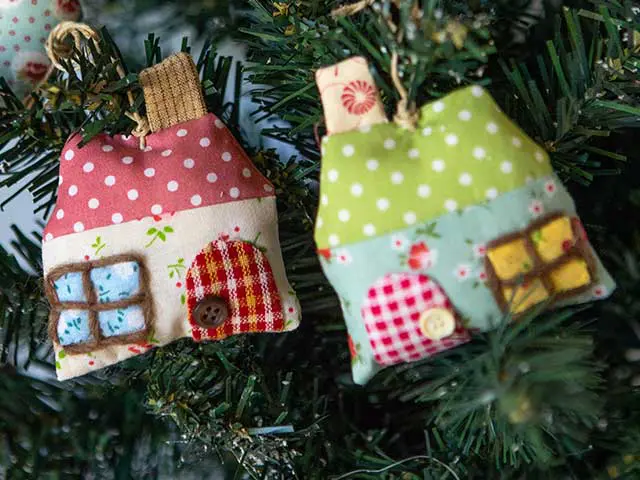
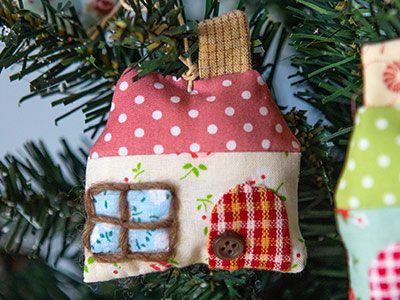
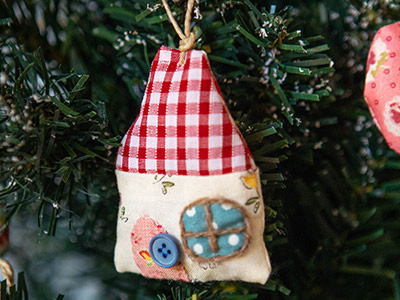
Christmas Tree Ornament (House)
ออกแบบโดย
Sachiyo Ishii
ขนาดเมื่อทำเสร็จแล้ว
6 x 6.5 cm
ผลิตภัณฑ์


Sewing machine
Press iron
Materials
• Oddments of printed fabric
• Buttons
• Small amount of brown yarn
• Jute string
• Sewing thread in matching colours
• Small piece of sturdy card
• Toy filling

วิธีทำ
Steps: ‘How to sew Chimney’
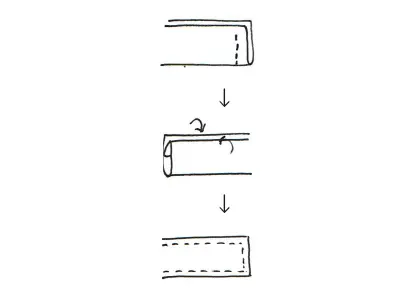
1. Fold in half with right sides together. Sew one of the short edges. Turn right side out.
2. Fold in seam allowance.
3. Sew around edges.
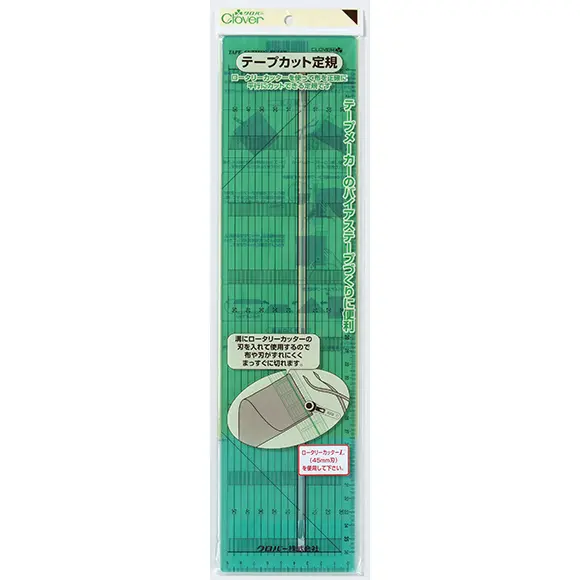
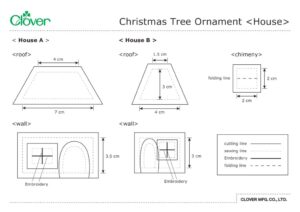
With Rotary Cutter, cut fabric using House template of Wall and Roof pieces (templates include 0.5cm seam allowance).
With right sides together, sew one Roof piece and one Wall piece together, sewing top edge of Wall to bottom edge of Roof. Repeat for second panel.
With Air Erasable Marker, mark Door, Chimney and Window shapes on a separate piece of fabric. Cut with 0.5 cm seam allowance.
Cut card to Door and Window template without seam allowance (use dotted lines to cut). Work a running stitch around within seam allowance of Door and Window fabric pieces, place card templates at centre of fabric pieces and pull thread tight to gather fabric edge, enclosing the card edges. Press with iron.
Mark Door and Window positions on one of the House panels with Air Erasable Marker. Sew Door and Window pieces in place on panel with over-cast stitch, using Black Gold Needle Applique Sharp and matching coloured thread. Embroider windowsill with yarn.
Attach button to Door.
Fold Chimney piece in half with right sides together, sew one of the short edges and turn right side out.
Fold in seam allowance on long sides and stitch around the edges over fold. You do not need to sew the remaining short edge (see diagram).
Place two House pieces with right sides together. Sandwich Chimney piece with unsewn short edge matching the Roof edge. Sew front and back panels together, leaving an opening. Turn piece right side out.
Lightly stuff with toy filling, fold in seam allowance at opening and close it with ladder stitch.
Attach jute string.
Variations
Attach motif mirror image to House A.
House B
Work as for House A with template given.