Customize Consent Preferences

We use cookies to help you navigate efficiently and perform certain functions. You will find detailed information about all cookies under each consent category below.

The cookies that are categorized as "Necessary" are stored on your browser as they are essential for enabling the basic functionalities of the site. ... 

Always Active

Necessary cookies are required to enable the basic features of this site, such as providing secure log-in or adjusting your consent preferences. These cookies do not store any personally identifiable data.

No cookies to display.

Functional cookies help perform certain functionalities like sharing the content of the website on social media platforms, collecting feedback, and other third-party features.

No cookies to display.

Analytical cookies are used to understand how visitors interact with the website. These cookies help provide information on metrics such as the number of visitors, bounce rate, traffic source, etc.

No cookies to display.

Performance cookies are used to understand and analyze the key performance indexes of the website which helps in delivering a better user experience for the visitors.

No cookies to display.

Advertisement cookies are used to provide visitors with customized advertisements based on the pages you visited previously and to analyze the effectiveness of the ad campaigns.

No cookies to display.

back To Top
ภาษา

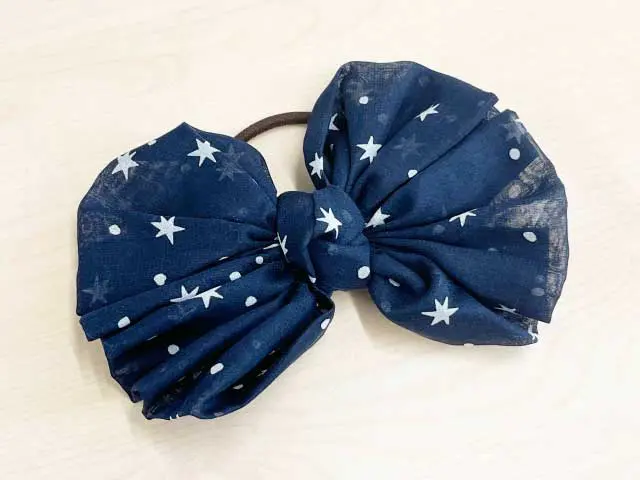
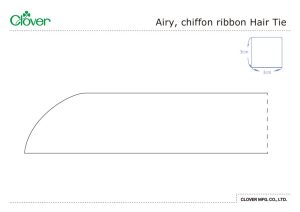
Airy, chiffon ribbon Hair Tie

picture

ออกแบบโดย

Toyo Uchida

Materials

・Chiffon fabric:

 - 14 × 50 cm, 2 pieces

 - 6 × 20 cm, 1 piece

・1 hair elastic (in a loop)

・Thread for sewing by hand


เทมเพลต

thumbnail of IC-S-188_Airy,_chiffon_ribbon_Hair_Tie_template_En
icon

วิธีทำ

1
picture

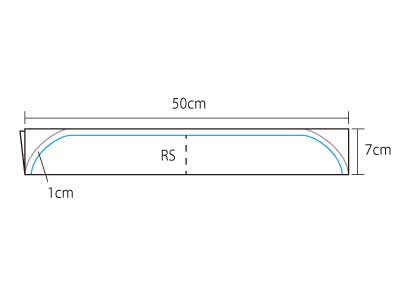
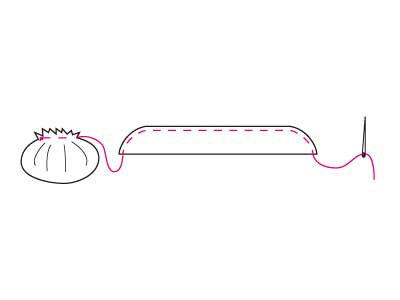
Fold the 14 × 50 cm fabric in half, with the front facing outward. Use the template to mark the line to sew, allow a 1-cm margin and cut the fabric. Do the same to the other piece of fabric.

Note: Cut with a seam allowance of 1 cm.

2
picture

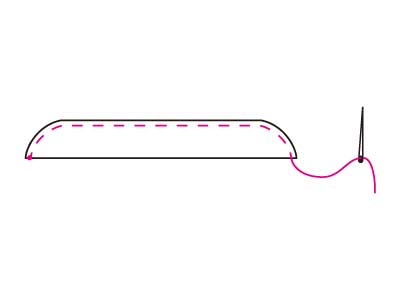
Sew a rough running stitch (stitch length about 1 cm), then pull the thread to draw the fabric together. With the same thread, do the same to the second piece of fabric and draw the fabric together.

picture

picture

3
picture

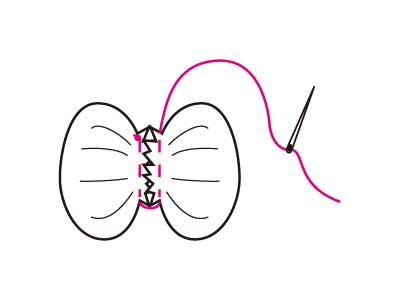
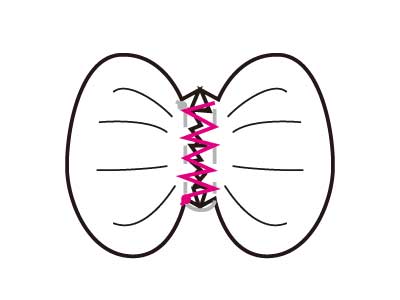
Sew the left and right pieces of fabric together in the middle.

4
picture

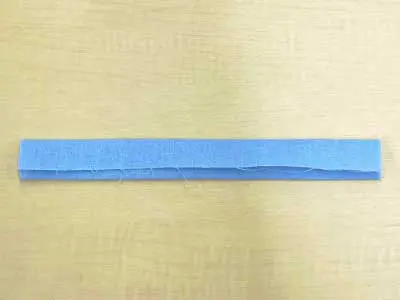
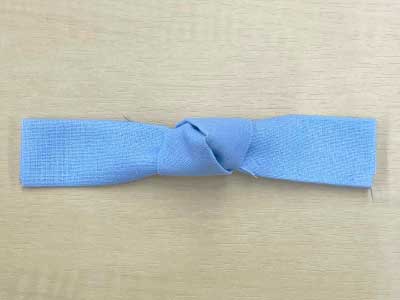
Make the part to attach to the middle of the ribbon.
After folding the 6 cm × 20 cm fabric into three, tie it into a simple knot that sits in the center of the fabric (the image shows a different fabric).

Fold into three so that the edge of the fabric lies slightly inside.

picture

Arrange it so that the edge of the fabric does not appear on the front

5

With the knot facing the front, place (4) in the center of (3). On the back, insert the looped hair tie and wrap (4) around it. Complete by folding about 1 cm of the ends inward and sewing them in place.(Cut it if it is too long)