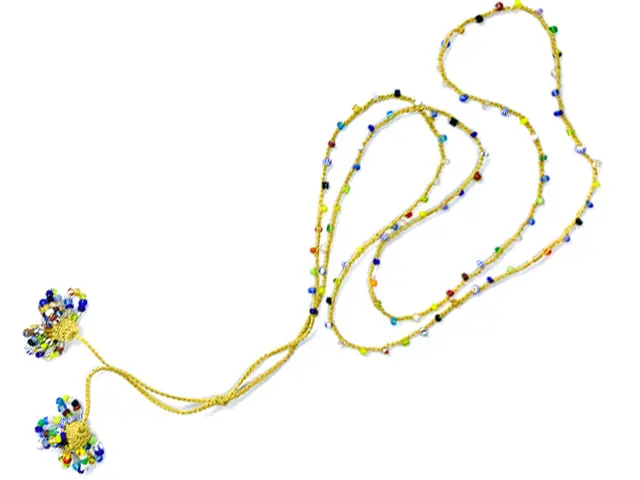
AFRICAN LOVE BEAD NECKLACE
ออกแบบโดย
Jasmin Jones
ผลิตภัณฑ์
Materials
•Vintage string of African love beads 2-3mm size. These beads can be picked up from a bead merchant and on Etsy easily.
•Gütermann Top Stitch Thread 30m spool.
This is a strong heavy polyester thread and is used mostly for decorative sewing and it is also suitable for fine crochet. Good for jewellery because of strength and colour fastness. Here, the colour Col. 893 is used.
Stitches
This pattern is written in UK terminology with US tems with-in( ). E.g.:- tr (dc)
Terms
〇UK crochet terms
sl st- slip stitch
ch- chain
tr- treble crochet
〇US crochet terms
sl st- slip stitch
ch- chain
dc- double crochet
STYLE
STYLE: 1.- SHORT KNOTTED STYLE – Knotted close, slips over the head. Total amount of beads needed 256.
STYLE: 2.- LONG LARIAT STYLE – Open ended, wear multiple ways. Total amount of beads needed 356.
Both necklaces are made exactly the same way.
The “lariat” style is just longer than the “knotted” style.
วิธีทำ
START
by emptying your African love beads into the clear tube, thread your CLOVER “Swift Bead”, follow written instructions on how to use the quick beading needle.
For the knotted style take your CLOVER “Swift Bead” and thread 102 beads on to your thread, for the Lariat style thread 202 beads. (see pic. 1. 2. & 3.)
NECKLACE LENGTH
Cast on to your hook, slide one bead up close to the hook then chain, this will secure a bead at the very beginning. This first starter bead at the beginning will help hold the tassel in place and we will end the necklace length with a bead as well. Continue to plain chain approximately 11-12cm, (see pic. 4. & 5.).
TIP-Choose a larger size bead for the first and last bead on the necklace length.
After you have completed the plain chain section work beaded section as follows.
*Slide bead up close to the hook and chain to secure the bead, (see pic. 6. & 7.), ch 3, secure a bead, ch 3, repeat from *until you get to the second last bead, secure the second last bead, then plain chain a section 10cm.
NOTE:
I like to make it a bit asymmetrical, if you want a very symmetrical necklace then make the plain chain section the same lenght as the beginning plain chain section (11-12cm).
Secure the final bead at the end of the plain chain section. (see pic 8.).
TASSELS
Make 2.
You will need to thread 154 beads, 77 beads per tassel. Make a magic circle, ch 3 (counts as first tr (dc)), 13 tr (dc) into magic circle = 14 tr (dc). Join with sl st into the top of the ch 3. (see pic. 9. & 10.)
Slide 11 beads up close to the hook sl st into the next tr (dc), *sl st into the next dc, slide 11 beads up to the hook sl st into next tr (dc). Reat from * 5 times more, = 7 bead loops. (see pic. 11. 12. & 13.)
*DO NOT PULL CENTRE MAGIC RING TIGHT AT THIS POINT.
NOTE: I found the tassels sit best with the right side underneath and the wrong side of the crochet facing up. The crochet tassel naturally cups with the wrong side out.
Do what you prefer. (see pic. 14.)
FINISHING
Slide each tassel over the end bead of the necklace length now pull the magic ring as tight as possible. Slide the tassel down to the end, the end bead should stop it sliding off.
Secure the tassel in place and finish off all ends. (see pic. 15.)
Lastly if you choose to do the knotted style, knot the two ends together in the plain chain section. (see pic. 16.)


