
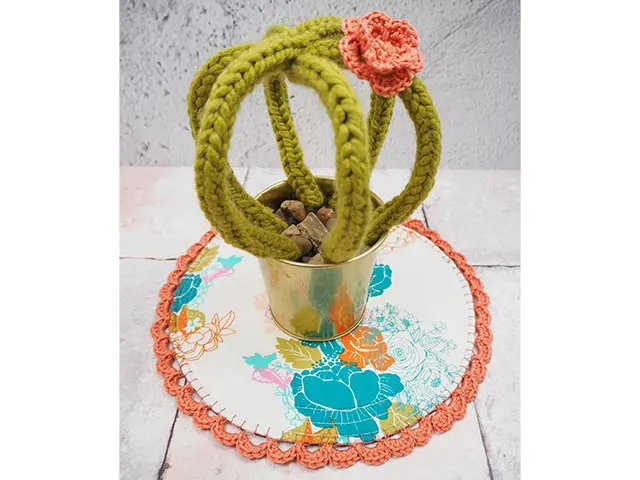
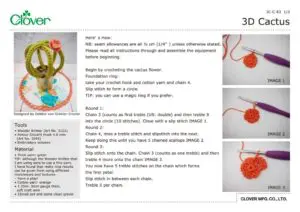
3D Cactus
ออกแบบโดย
Debbie von Grabler-Crozier
ผลิตภัณฑ์
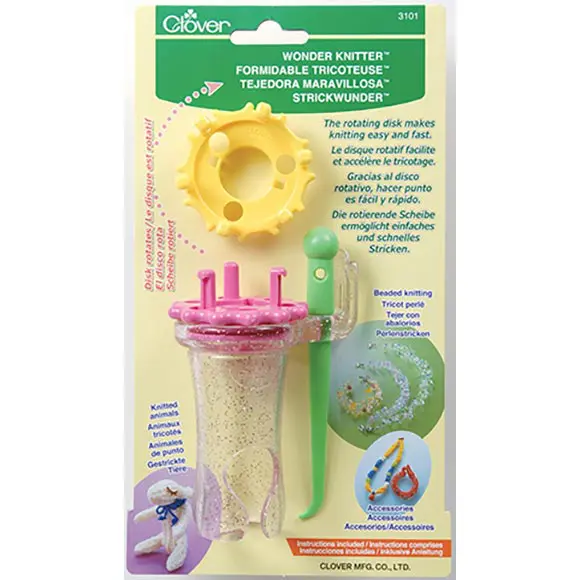
Materials
• Thick yarn: green
TIP: Although the Wonder Knitter that I am using says to use a fine yarn, I have found that really nice results can be given from using different thicknesses and textures – have a play!
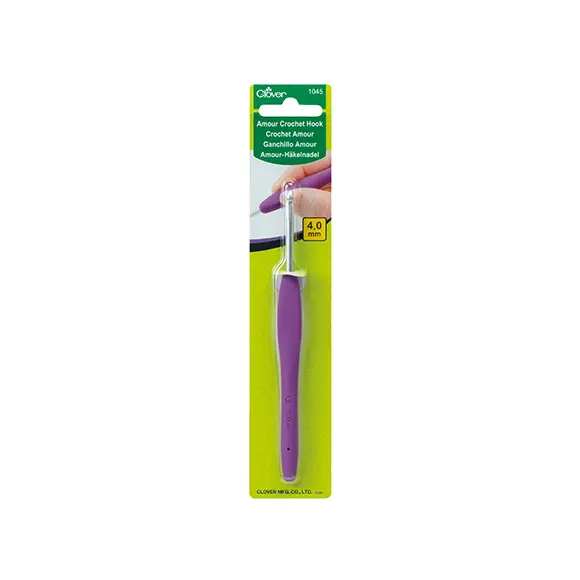
• Cotton yarn: orange
• 1.35m- 3mm gauge thick, soft craft wire
• 1Small pot and some clean gravel
วิธีทำ
NB: Seam allowances are all ½ cm (1/4”) unless otherwise stated. Please read all instructions through and assemble the equipment before beginning.
Begin by crocheting the cactus flower. Foundation ring: take your crochet hook and cotton yarn and chain 4. Slip stitch to form a circle.
TIP: You can use a magic ring if you prefer.
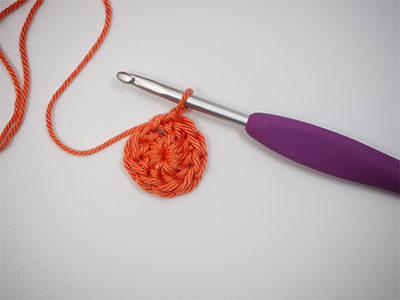
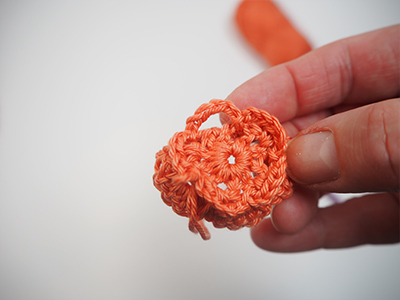
Round 1: Chain 3 (counts as first treble (US: double) and then treble 9 into the circle (10 stitches). Close with a slip stitch IMAGE 1.
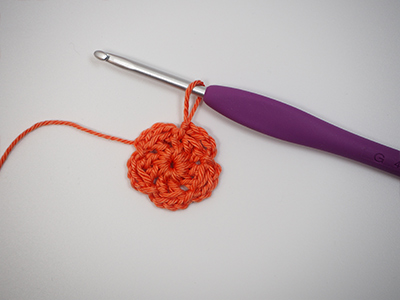
Round 2: Chain 4, miss a treble stitch and slipstitch into the next. Keep doing this until you have 5 chained scallops IMAGE 2.
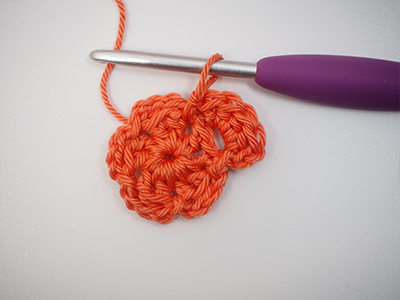
Round 3: Slip stitch onto the chain. Chain 3 (counts as one treble) and then treble 4 more onto the chain IMAGE 3. You now have 5 treble stitches on the chain which forms the first petal. Slip stitch in between each chain. Treble 5 per chain.
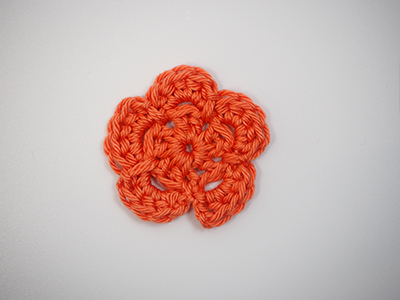
You now have five petals IMAGE 4. Slip stitch to close. Fasten off and weave in the ends.
Round 4: Turn the flower over and chain 6 this time working into the missed stitches from round 2 IMAGE 5. Make five of these.
TIP: Because you are working into the treble that you missed on the first round, the ‘petals’ will be nicely offset. Slip stitch onto the first chain.
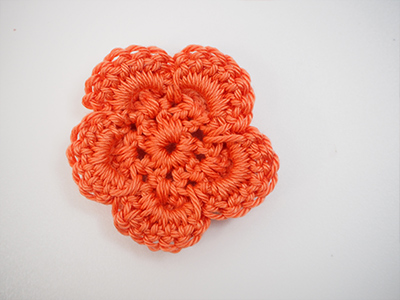
Chain 3 (counts as one treble) and then treble 6 into the first chain. Slip stitch and treble 7 times onto each chain to form the 5 rear petals IMAGE 6 and slip stitch in between each one. Fasten off and weave in the ends. The flower is now ready to use.
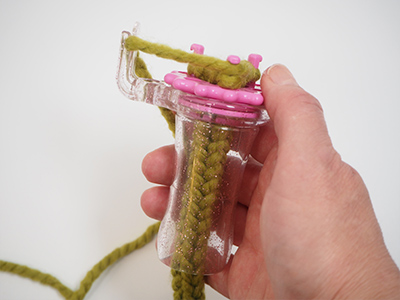
To make the cactus, make 3 green cords using the Wonder Knitter and the super chunky yarn IMAGE 7. Your cords need to be about 35cm long. Follow the instructions to make them and fasten them off.
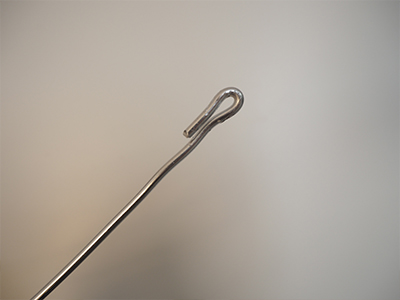
Cut the metre of wire into three equal pieces of 45cm each. Use a pair of pliers to fold one end of the wire over IMAGE 8.
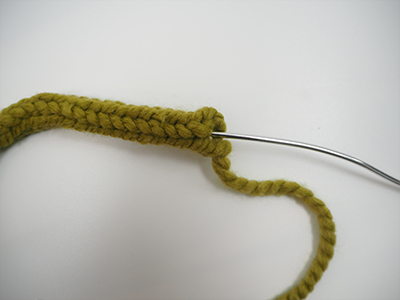
TIP: This stops the wire from snagging on every little piece of yarn as you push it through the cords!
Feed the wire through the three pieces of knitted cord IMAGE 9 and then undo the hook on the end of the wire so that it is straight and ready to push into the gravel. Repeat for all three.
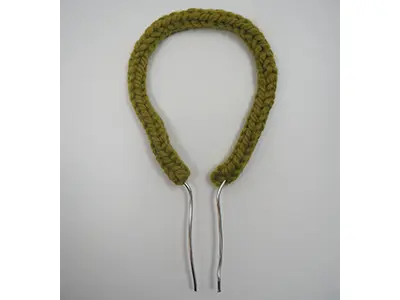
Shape the three pieces of cactus into a horseshoe shape IMAGE 10.
TIP: I prefer to take a wool needle and weave the ends of the yarn in rather than cutting them off.
Place the three pieces on top of each other and offset them so that you have a 3D outline of a cactus. Fasten in the middle. Attach the flower to the top of the cactus.
TIP: Your cactus will behave better once it is in the pot. The pot and the gravel helps to give it stability.
Push the wire ends into the pot of gravel and arrange it so that the wire is invisible.