
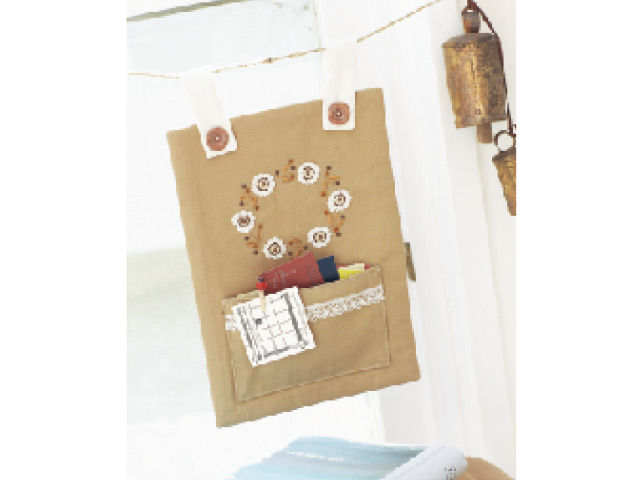
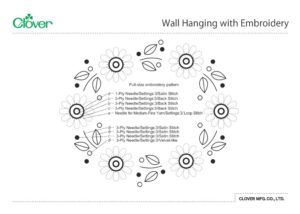
Wall Hanging with Embroidery
Инструменты
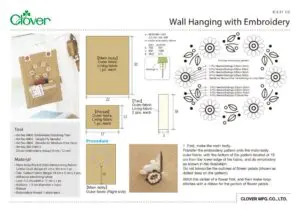
Materials
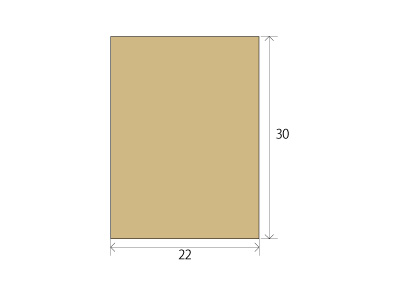
• Main body/Pocket (Outer fabric/Lining fabric): Cotton Duck (Beige) 61 cm x 30 cm x 1 pc.
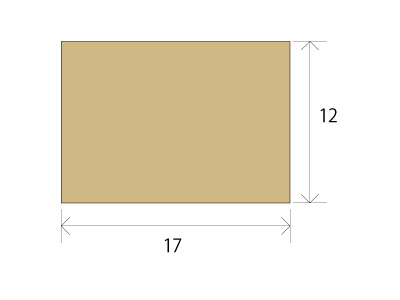
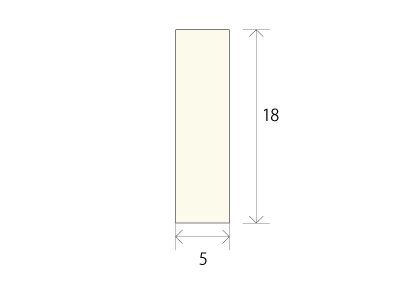
• Tab: Cotton Fabric (Beige) 18 cm x 5 cm x 2 pcs.
• Adhesive interlining/white
• Lace: 1.5 cm width x 17 cm x 1 pc.
• Buttons: 1.5 cm diameter x 2 pcs.
• Ribbon
• Embroidery thread: 1 skein each
Изготовление
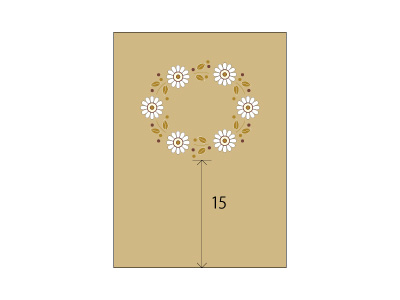
First, make the main body. Transfer the embroidery pattern onto the main-body's outer fabric with the bottom of the pattern located at 15 cm from the lower edge of the fabric. Do the embroidery as shown in the illustration. Do not transcribe the outlines of flower petals (shown as dotted lines on the pattern). Stitch the center of a flower first, then make loop-stitches with a ribbon for the portion of the flower petals.
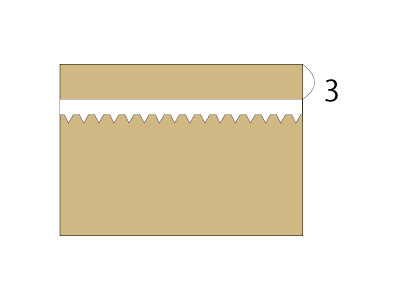
Then, make a pocket. Sew some lace onto the front of the outer fabric of a pocket. Put together the pocket's outer and lining fabrics wrong side out and stitch them together leaving an opening for reversing. Once the fabrics are stitched together, reverse them right side out and blind stitch the opening.
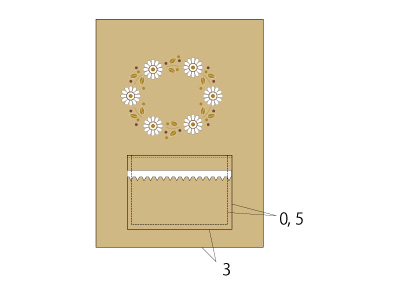
Sew the pocket onto the main body.
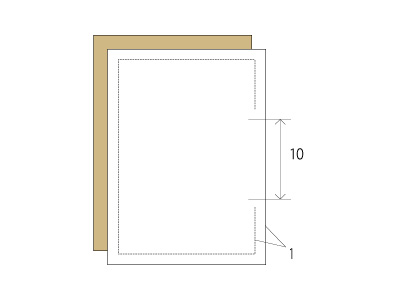
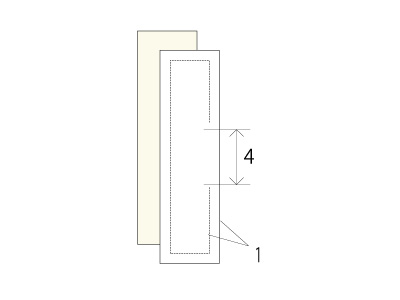
Put together the main-body's outer and lining fabrics with an adhesive interlining on each back with the wrong side out, and stitch them together leaving an opening for reversing. Once the fabrics are stitched together, reverse them right side out and blind stitch the opening.
Make tabs. Put together the outer and backing fabrics of a tab wrong side out, and stitch them together leaving an opening for reversing. Once the fabrics are stitched together, reverse them right side out and blind stitch the opening. Make two of these.
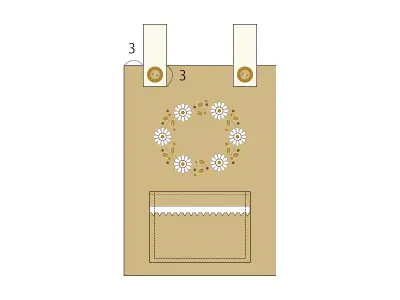
Sew the tabs onto the main body. Sandwich the main body with folded tabs and sew buttons to fix it as shown in the illustration.