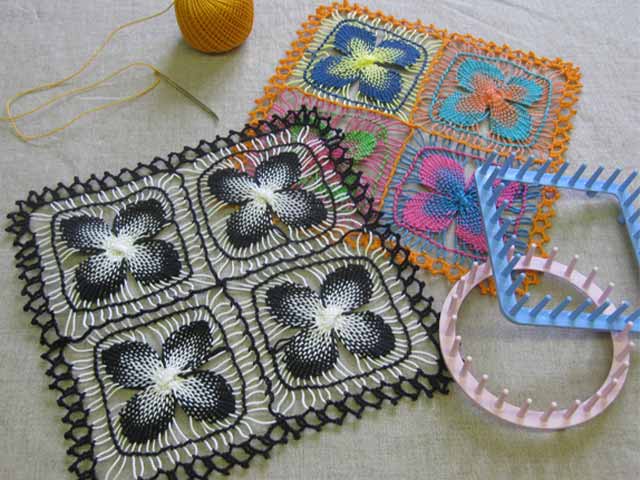
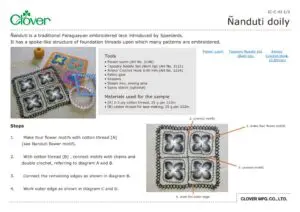
Customize Consent Preferences

We use cookies to help you navigate efficiently and perform certain functions. You will find detailed information about all cookies under each consent category below.

The cookies that are categorized as "Necessary" are stored on your browser as they are essential for enabling the basic functionalities of the site. ... 

Always Active

Necessary cookies are required to enable the basic features of this site, such as providing secure log-in or adjusting your consent preferences. These cookies do not store any personally identifiable data.

No cookies to display.

Functional cookies help perform certain functionalities like sharing the content of the website on social media platforms, collecting feedback, and other third-party features.

No cookies to display.

Analytical cookies are used to understand how visitors interact with the website. These cookies help provide information on metrics such as the number of visitors, bounce rate, traffic source, etc.

No cookies to display.

Performance cookies are used to understand and analyze the key performance indexes of the website which helps in delivering a better user experience for the visitors.

No cookies to display.

Advertisement cookies are used to provide visitors with customized advertisements based on the pages you visited previously and to analyze the effectiveness of the ad campaigns.

No cookies to display.

back To Top
Язык

Ñanduti doily

Materials

Materials used for the sample

• [A] 2-3 ply cotton thread, 25 g per 110m

• [B] cotton thread for lace making, 25 g per 222m


Abbreviations

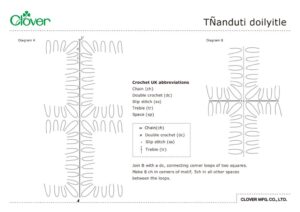
Crochet UK abbreviations

Chain (ch)

Double crochet (dc)

Slip stitch (ss)

Treble (tr)

Space (sp)


Шаблон

IC_C_43_template_enのサムネイル
icon

Лист с инструкциями (pdf)

IC_C_43_Nanduti _doilyのサムネイル
icon

Изготовление

1

Make four flower motifs with cotton thread [A] (see Nanduti flower motif).

2

With cotton thread [B], connect motifs with chains and double crochet, referring to diagram A and B.

3

Connect the remaining edges as shown in diagram B.

4

Work outer edge as shown in diagram C and D.