
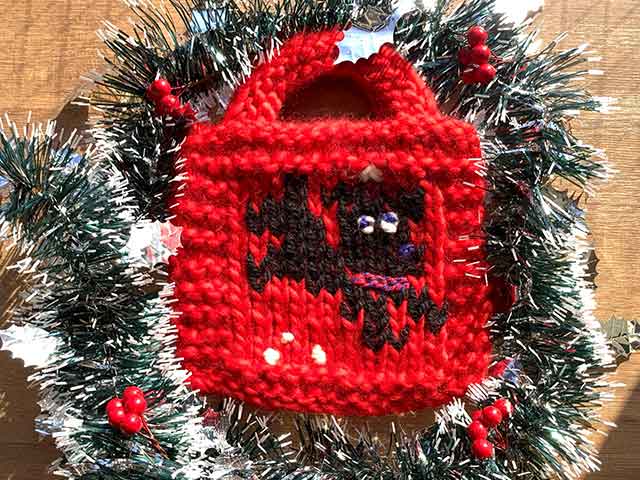
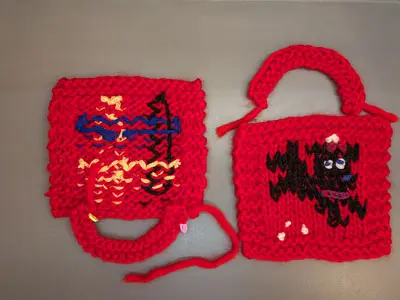
Fur Ball the Little Pup
Разработано
Aikomoto
Готовый размер
body 20cm x 18cm Two 24 cm lengths of twine
Инструменты

Designer's comment on the project
A perfect mini bag for winter. you can knit right away, featuring a simple and sturdy base with cute patterns stitched onto it.
Materials
Yarn: Wool and the gang : 200g 1 balls.
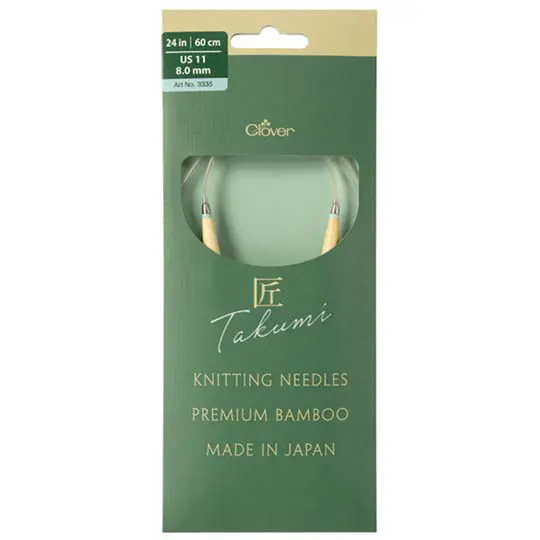
Recommend needle size is 10mm
80m = 200 g SUPER CHUNKY | 4 wpi
1 set of large snap buttons
For embroidery, you’ll need a small quantity—about 10 meters maximum of each color. I recommend using your stock yarn or exchanging with your neighbors. Choose the highest contrast colors for your knit base. I used six colors, but feel free to explore and enjoy your discoveries!
Изготовление
Gauge
7 stitches x 12 lows = 10x10cm
knit a foundation
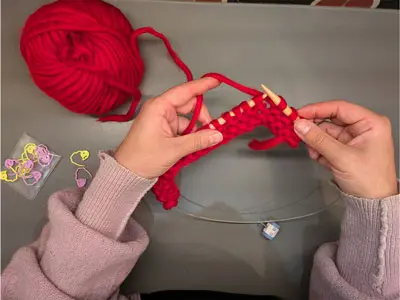
Make 17 cast on Backword loop cast on
Knit 4 rows in all knit stitches.
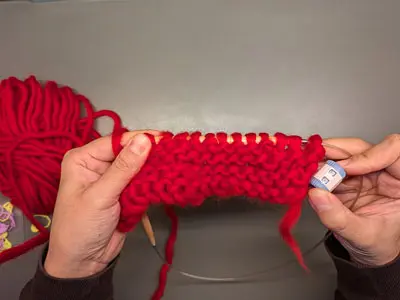
The right side will be the fifth row.
Row 5: All knit stitches.
Row 6: 3 knit stitches, 11 purl stitches, 3 knit stitches.
Rows 7-18: Repeat rows 5-6.
Rows 19: All knit stitches.
Rows 20-22: All knit stitches.
Bind off.
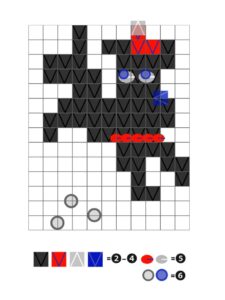
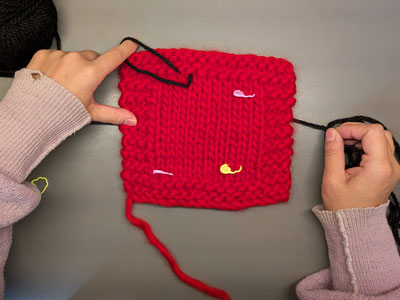
Embroiderie 1
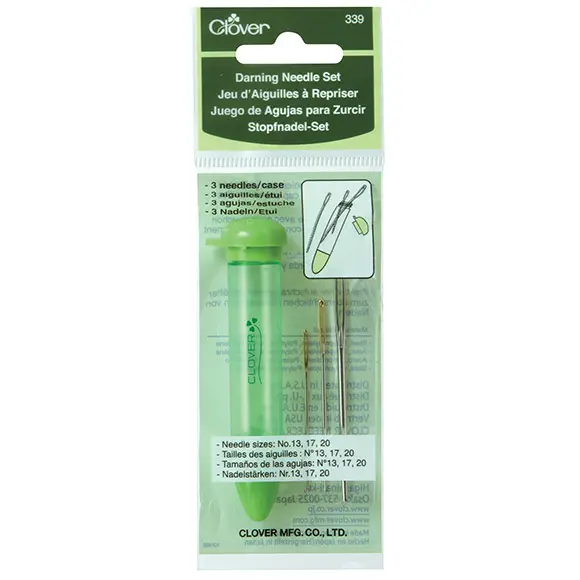
The embroidered motifs are created using Swiss Darning (also known as Duplicate Stitch). You’ll need one, two, or three strands of yarn, depending on the size of your yarn, and a darning needle. Each square on the chart corresponds to one stitch. To begin, thread your needle with the yarn and secure the end on the backside of your work.
Embroiderie 2
Insert the needle from backside of work, at the knitted stitch you want to duplicate, starting at the bottom of the 'V'.
Embroiderie 3
Bring the needle across from one side of the top of the stitch 'V' to the other. Pull the yarn through, then insert the needle back into the starting position to cover the stitch with the new yarn.
Embroiderie 4
Continue this process, following the chart design.
Embroiderie 5
Chain stitch:Bring the threaded needle up through the fabric at your starting point.Insert the needle back into the fabric a short distance away and bring it back up further along.Hold the thread down with your finger to form a loop before pulling the thread through.Pull the thread to secure the stitch.
Embroiderie 6
French knot stitch:Bring the threaded needle up through the fabric.
Wrap the thread around the needle 1-2 times.
Insert the needle back into the fabric close to where it came out.
Pull the thread through, forming a knot on the surface.
Handles
Make 20 cast on Backword loop cast on
Knit 3 rows in garter stitch, then bind off.
Assembly 1
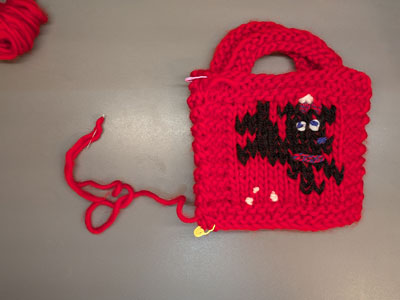
Attach the handles with a darning needle, about 5 centimeters from each end and 2 to 3 centimeters from the top.
Assembly 2
Position the two halves of the snap button at the center top of the bag, mark their placement, and sew them on.
Assembly 3
Seam together all edges except for the top.