
Chairo the Wombat

Разработано
Anika Kam
Готовый размер
Approximately 7 cm tall if made using the same materials
Инструменты

Designer's comment on the project
・This pattern is suitable for beginners
・ This pattern uses US terms
・This pattern is worked in continuous rounds unless otherwise specified
・ The head and body will be worked as one piece
・ Increases and decreases have been staggered when making the head and body
・ Use a stitch marker or piece of scrap yarn to mark the start of each round
・ Rounded brackets () indicate the pattern and the number of times it is repeated e.g. (sc 1, inc) x 6 means single crochet one stitch, increase in the next stitch. Repeat 6 times
・ Square brackets [] indicate the number of stitches you should have after each round
Materials
15g (40m) light brown 8 ply (DK) cotton
2g (5m) brown 8 ply (DK) cotton
Polyester fiberfill stuffing
4 ply (fingering) black cotton for eyes and nose
Black embroidery thread for eyebrows
[Optional] 6mm x 4mm oval safety eyes, blush makeup for cheeks
Abbreviations
sc: single crochet
inc: single crochet increase
dec: single crochet invisible decrease
FLO: front loop only
st(s): stitch(es)
R: round
() x n: repeat pattern n times
[]: number of stitches
Изготовление
Head and body
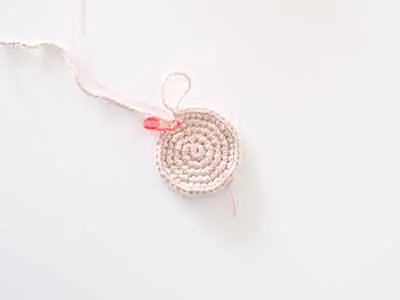
In light brown
R1: 8 sc in magic circle [8 sts]
R2: (inc) x 8 [16 sts]
R3: (sc 1, inc) x 8 [24 sts]
R4: (sc 1, inc, sc 1) x 8 [32 sts]
R5: (sc 3, inc) x 8 [40 sts]
R6 - R13: sc in each st - 8 rounds [40 sts]
If you're using safety eyes, place them between R9 and R10 of the head, 7 stitches apart (hint: have 7 stitch 'holes' between the eyes) I
R14: (sc 3, dec) x 8 [32 sts]
R15: (sc 1, dec, sc 1) x 8 [24 sts]
Start stuffing the head
R16: (dec) x 12 [12 sts]
Finish stuffing the head
R17: in FLO (inc) x 12 [24 sts]
R18: (sc 3, inc) x 6 [30 sts]
R19 - R25: sc in each st - 7 rounds [30 sts]
R26: (sc 3, dec) x 6 [24 sts]
Start stuffing the body
R27: (sc 1, dec, sc 1) x 6 [18 sts]
R28: (dec) x 9 [9 sts]
Finish stuffing the body
Fasten off and leave a long thread. Thread the yarn through the front loops of the 9 sts and pull to close. Weave in the end.
Ears
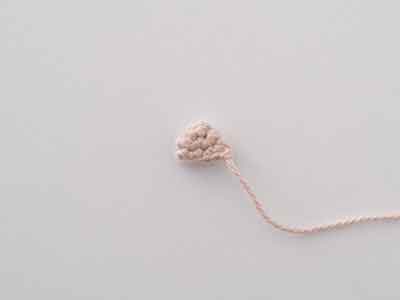
In light brown
R1: 6 sc in magic circle [6 sts]
R2: (sc 2, inc) x 2 [8 sts]
R3: (sc 3, inc) x 2 [10 sts]
Do not stuff
Fasten off and leave a long thread for sewing.
Arms
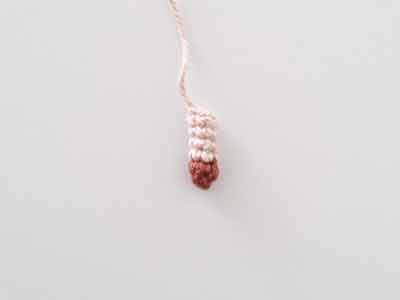
Starting in brown
R1: 6 sc in magic circle [6 sts]
R2: sc in each st [6 sts]
Change to light brown. Cut and fasten off brown, weaving in end.
R3 - R6: sc in each st - 4 rounds [6 sts]
Do not stuff
Fasten off and leave a long thread for sewing.
Legs
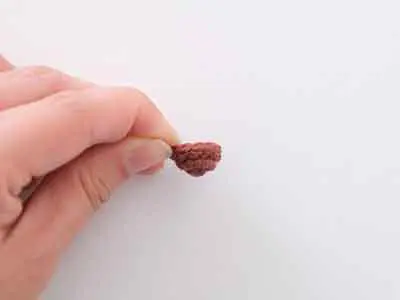
In brown
R1: 5 sc in magic circle [5 sts]
R2: (inc) x 5 [10 sts]
R3: sc in each st [10 sts]
Fasten off and leave a long thread for sewing. The foot will be stuffed when we attach it to the body.
Assembly

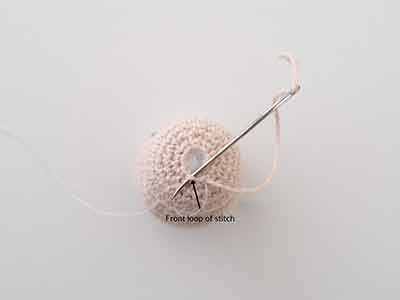
1. Using 4 ply black cotton, sew the eyes to the head. The eyes are sewn over round 9, 5 stitches apart (hint: have 5 stitch 'holes' between the eyes). Make 3 vertical stitches.
2. Using black embroidery thread, sew the eyebrows above the eyes over round 7, diagonally across 1 stitch.
3. Using 4 ply black cotton, sew the nose to the head. The nose is sewn over round 11. The shape of the nose will be an upside-down triangle, with the top of the nose spanning across 3 stitches. Make 3 to 4 stitches from the bottom stitch 'hole' (refer to image) to each of the top stitch 'holes'. Make 4 horizontal stitches spanning across the top stitch 'holes'. Note: there is a slightly wider gap between the nose and the eyes if using the safety eye option instead of the embroidered eye option.
4. Flatten the ears and use a whip stitch to sew the ears over rounds 4 to 7 of the head. The bottom of the ears will be 4 to 5 stitches away from the eyebrows (hint: have 4 to 5 stitch 'holes').
5. Flatten the arms and use a whip stitch to sew the arms between rounds 18 and 19 of the body. The arms are 9 stitches apart at the front (hint: have 9 stitch 'holes' between the arms). Use a whip stitch to sew the legs over rounds 23 to 25 of the body. The legs are 2 stitches apart (hint: have 2 stitch 'holes' between the legs). Remember to add some stuffing before sewing the last few stitches of the leg!
7. [Optional] Apply blush for the cheeks.