Tunique Vichy légère
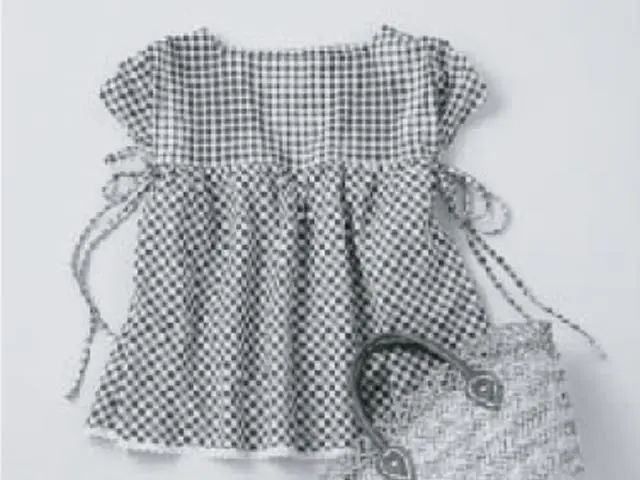
Outils

Matériels
• Tissu…110 cm de largeur, 220 cm
• Entoilage thermocollant…80 cm x 15 cm
• Dentelle…2 m
• Appliquer et Froncer, Bande à Froncer Fusible
Fabrication
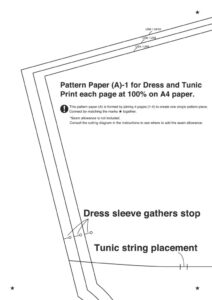
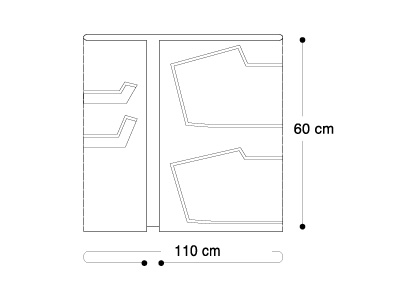
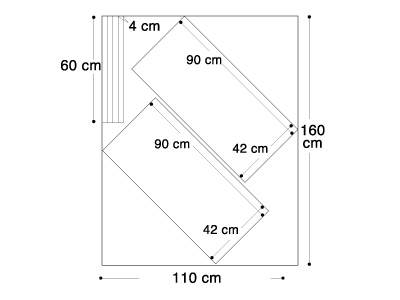
Diagramme de découpe
*Les marges de couture sont incluses dans les mesures des pièces du corps.
Sauf indication entre parenthèses (), les marges de couture sont de 1 cm de large.
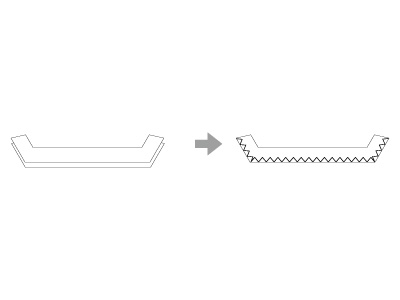
*Si vous n'avez pas de surjeteuse, vous pouvez utiliser un point zigzag pour finir les bords bruts.
Fusionnez l'entoilage sur l'envers des parmentures à l'aide d'un fer à repasser avant de surjeter les bords.
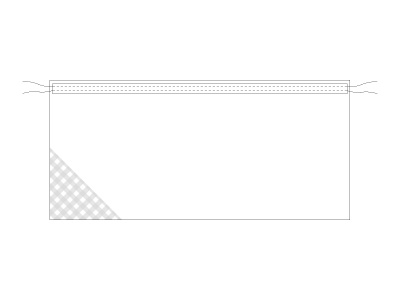
Repassez un peu de bande à froncer fusible sur le bord supérieur des deux pièces du corps.
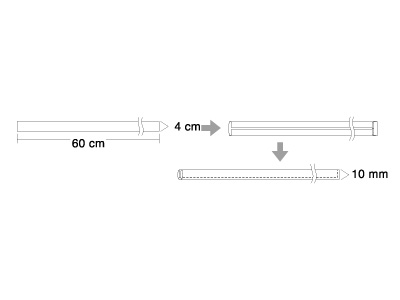
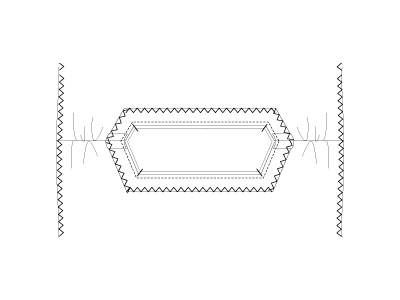
Faites quatre pièces de cordon
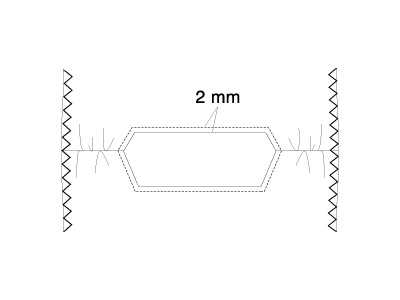
Rassembler les pièces du corps de façon à ce qu'elles soient de la même largeur que les pièces de l'empiècement. Placer le corps sur l'empiècement, endroit contre endroit, et insérer les cordons de l'étape 3 entre les deux couches, à 10 cm du bord. Epingler et coudre le corps à l'empiècement à la machine à coudre. Surjeter les deux marges de couture ensemble et surpiquer sur l'endroit, comme sur le diagramme. Répéter ces étapes pour le devant et le dos de la tunique.

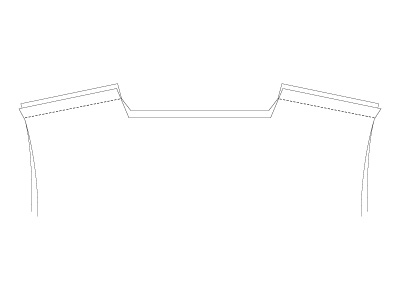
Placez les empiècements avant et arrière ensemble, endroit contre endroit, et cousez les épaules. Ouvrez les coutures au fer et surjetez les marges de couture.
Surjetez les bords des deux côtés.
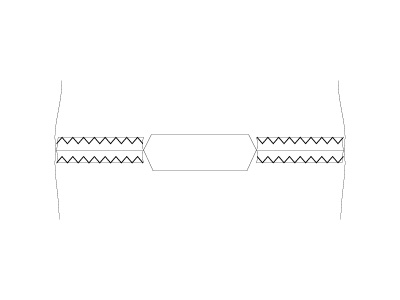
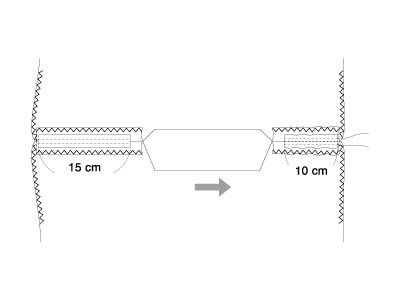
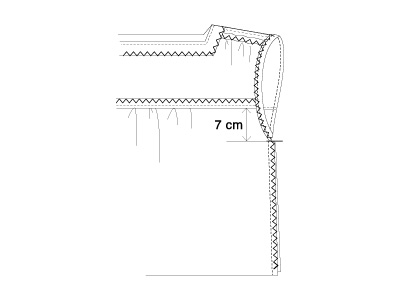
Repassez 15 cm de bande à froncer le long de chaque couture d'épaule, sur le bord extérieur.
Tirez sur les fils du ruban pour les froncer et les raccourcir à 10 cm.
Cousez sur les fronces à la machine à coudre pour les fixer en place.
*Suggestion : Cousez quelques rangées de points pour fixer les fronces.
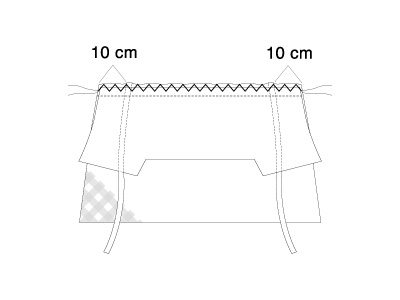
Cousez les parmentures le long des épaules, endroit contre endroit, et ouvrez les coutures au fer. Faites correspondre la parementure avec le corps, endroit contre endroit, et cousez autour de l'encolure. Coupez les marges de couture dans les coins jusqu'à la ligne de couture, comme indiqué dans le diagramme. Faites passer la parmenture sur l'envers, repassez et surpiquez-la en place autour de l'encolure.
Cousez les côtés et ouvrez les coutures au fer. Repassez la marge de couture des poignets et cousez à la machine à coudre.
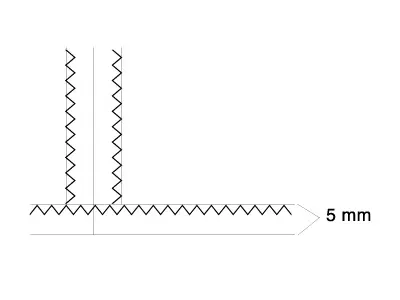
Surjeter le bord et le replier de 5 mm.
Posez de la dentelle et cousez à la machine.