Pom-Pom ear accessories
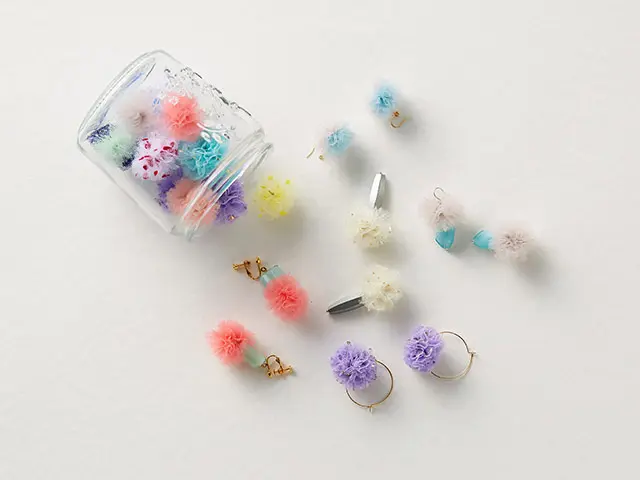
Enjoy variety of combinations to create your own individual style!
Tools

jewellery making pliers
jewellery wire cutters
Materials
A:
• Soft Tulle fabric cut into 4 strips, each 2cms wide x 35-40cms long
• 2 x 4mm jump rings
• strong hand sewing thread(to tie pompoms)
• earring findings x 2 pcs(loop type)
B:
• 4x Soft Tulle fabric strips: 2 cm wide x 35-40cm long
(we used 2 colours to give a two-tone effect)
• Jump rings: 4 mm x 2 pcs, 3 mm x 2 pcs
• 2 x 20mm Double eye pins
• hand sewing thread(to tie pompoms)
• earring findings x 2 pcs(hook type)
C:
• 4 x Soft Tulle fabric strips: 2cm wide x 35-40 cm long
• Jump ring: 4mm x 2 pcs
• Head pin: 40mm x 2 pcs
• hand sewing thread(to tie pompoms)
• big beads with a centre hole x 2 pcs
• small beads with a centre hole x 2 pcs
• earring findings x 2 pcs(hook type)
D:
• 4 x Soft Tulle fabric strips: 2cm wide x 35-40 cm long
• Jump ring: 3mm x 2 pcs
• Head pin: 40mm x 2 pcs
• hand sewing thread(to tie pompoms)
• Plastic beads with a centre hole(approx. 20 mm) x 2 pcs
• earring findings with attached loops
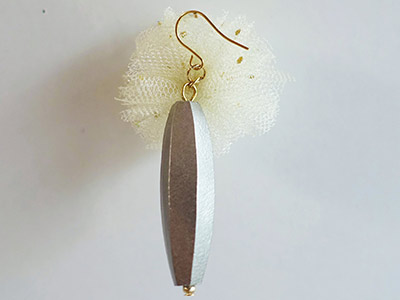
E:
• 4 x Soft Tulle fabric strips: 2cm wide x 35-40 cm long
• Jump ring: 4mm x 2 pcs
• Head pin: 40mm x 2 pcs
• hand sewing thread(to tie pompoms)
• Wooden bead with a centre hole(approx. 30 mm) x 2pcs
• plastic small bead x 2pcs
• earring findings (hook type)

Making
【A】Making
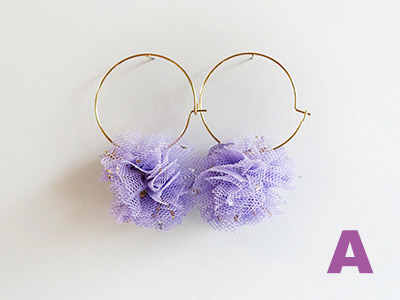
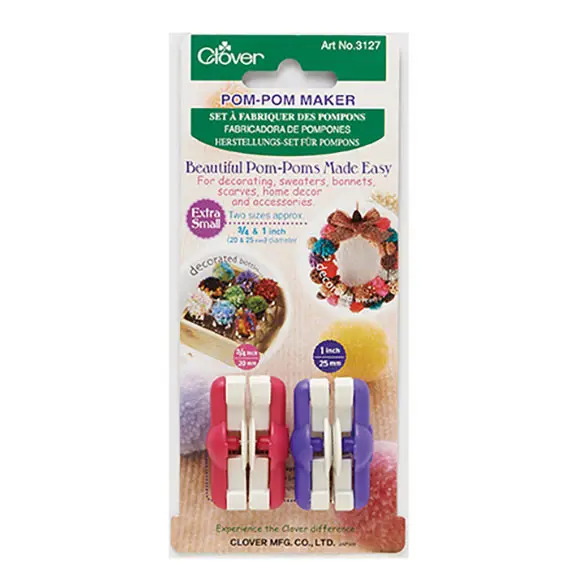
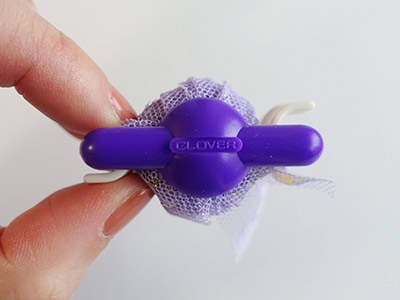
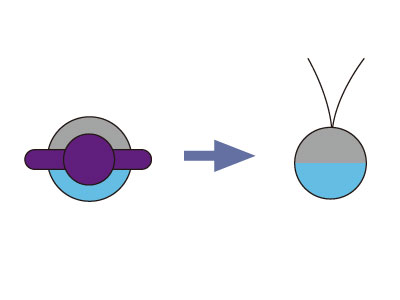
Wind one tulle fabric strip around the arm of Pom Pom Maker.(☆) Repeat(☆). Using another tulle fabric strip on the other arm of the Pom Pom Maker.
tip: Twist fabric strips whilst winding. Tulle pompoms come out beautifully. Do not streach tulle whilst winding.

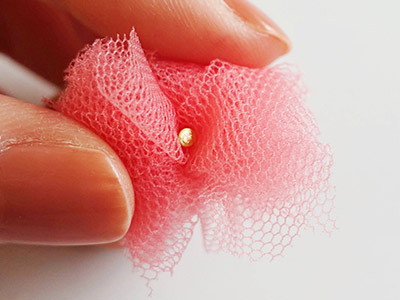
Follow the instructions to complete the pom-pom, using a strong thread to wind twice around the centre before tying with a knot to finish.
See full instructions here; https://www.instagram.com/p/CMMK2ayHMUS/
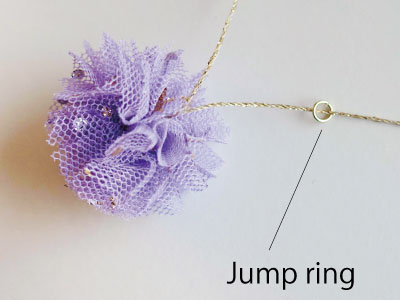
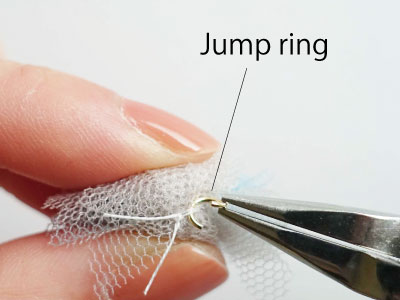
Before cutting thread ends, pass a jump ring through one of the threads, then knot both thread ends again firmly before cutting the ramaining thread ends to 5 mm. Trim away any stray bits of tulle to create a ball shape.
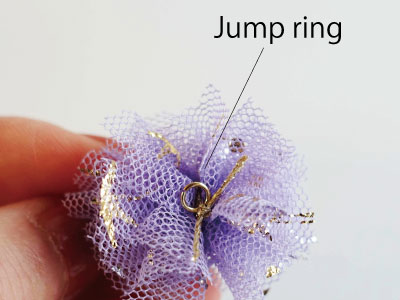
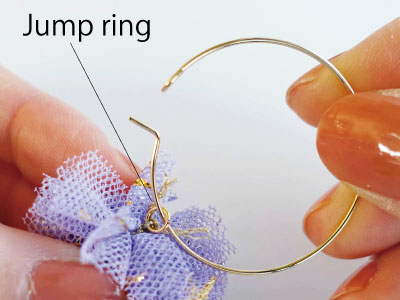
Repeat Steps 1 and 2 to make a second pompom, attaching a jump ring as in step 3. Insert earing finding onto the jump ring. Finished!
【B】Making
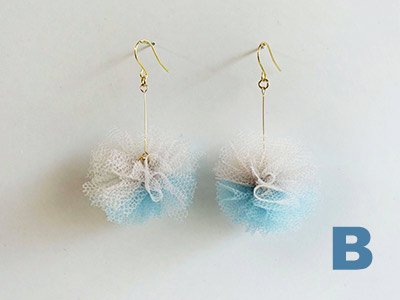
The basic steps are the same as project 【A】. Wind tulle fabric strip, colour 1 to one arm of Pom-Pom Maker and colour 2 to the other arm. Follow instructions for making a pompom. Tie and knot thread around pom-pom centre before snipping back the loose ends to 5mm.
Repeat Step 1 to make another pompom. Attach a jump ring to the centre thread as illustrated. Join each part as shown in diagram.
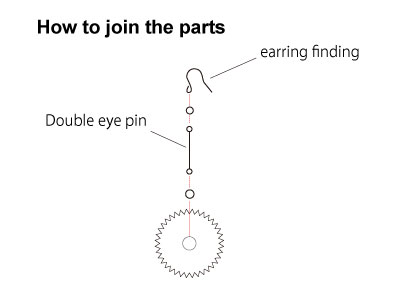
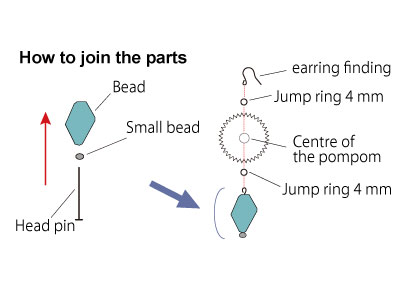
【C】Making
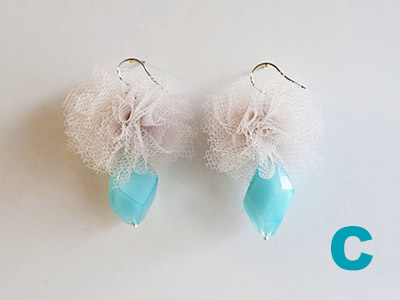
Follow step 1 & 2 as in project 【A】 to make pompoms. After tying thread around centre of the pompom, snip ends to 5mm. Attach jump ring securely to the centre thread. Join each jewellery part as illustrated. Trim away surplus wire after bending it back to the bead.
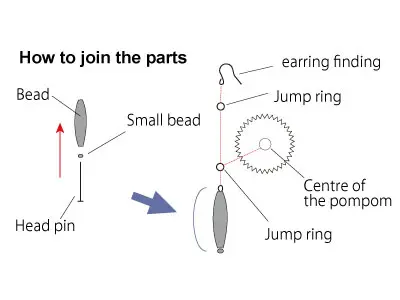
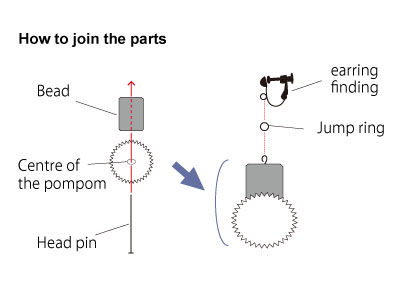
【D】Making
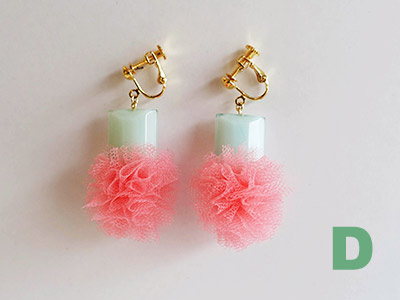
Follow step 1 & 2 as in project 【A】 to make pompoms. After tying thread securely around centre of the pompom, snip back to 5mm. Pass a head pin through the centre of the pompom. Then thread on the bead. Trim away excess wire after forming a loop as shown on diagram. Attach a jump ring and then the earring finding.
【E】Making
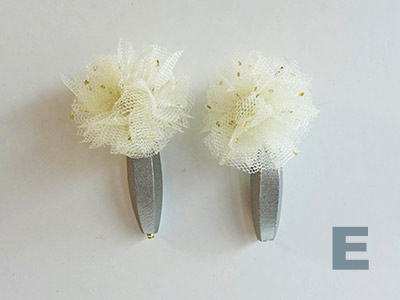
Follow step 1 & 2 as in project 【A】 to make pompoms. After tying thread around centre of the pompom, snip back to 5mm. Attach a jump ring to the centre thread as illustrated. Join each part as shown in diagram. Trim away excess wire at the end of the head pin after bending it back to the bead.